
I wanted to make a tutorial in english, due to traffic from Apartment Therapy after this Ikea hack appeared there.
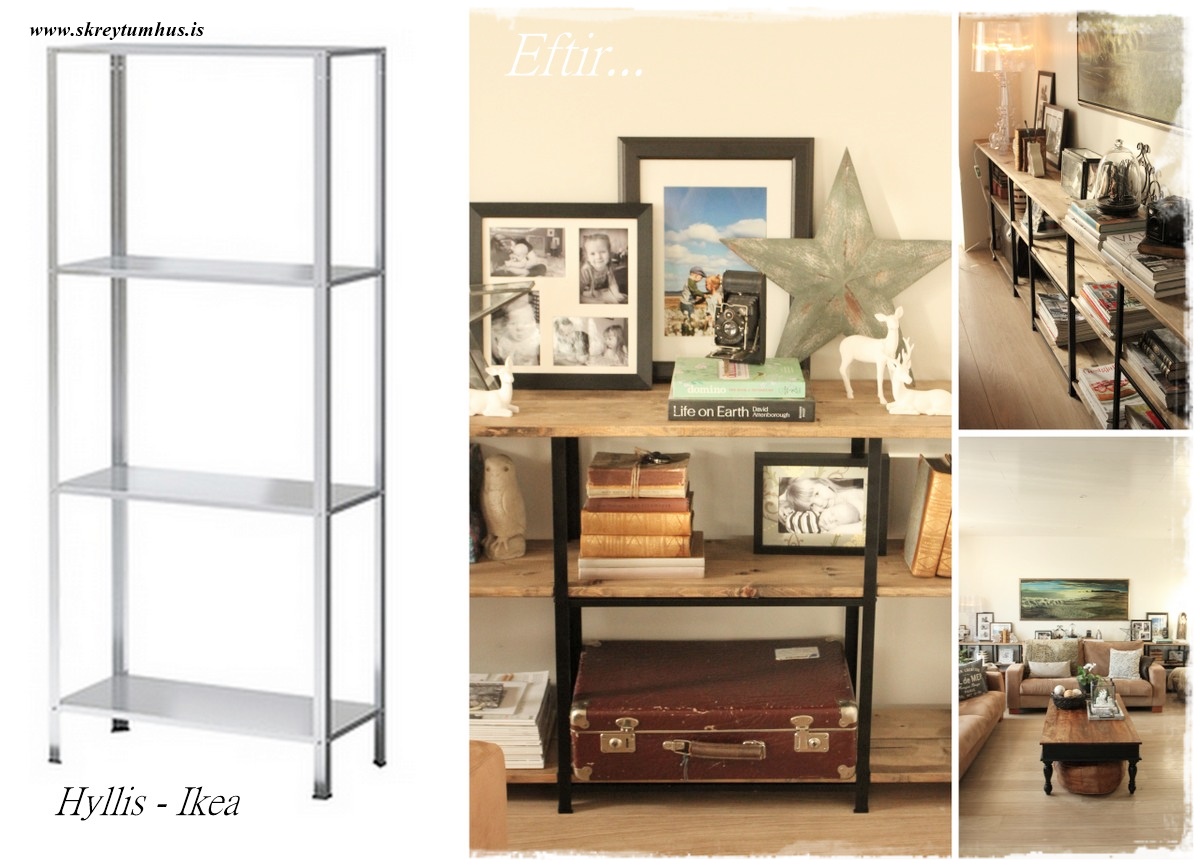
What we really wanted was to make a sort of build-in industrial shelving unit.
A bit Pottery Barn-ish and maybe with a dash of Restoration Hardware.
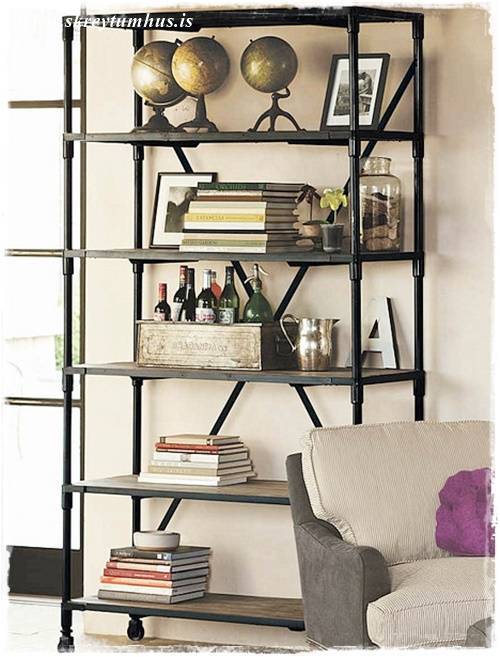
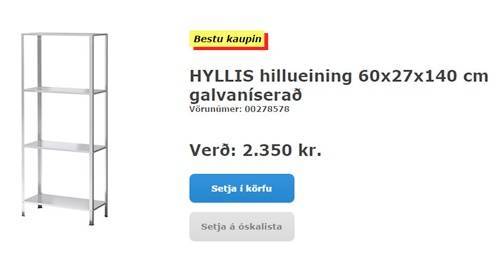
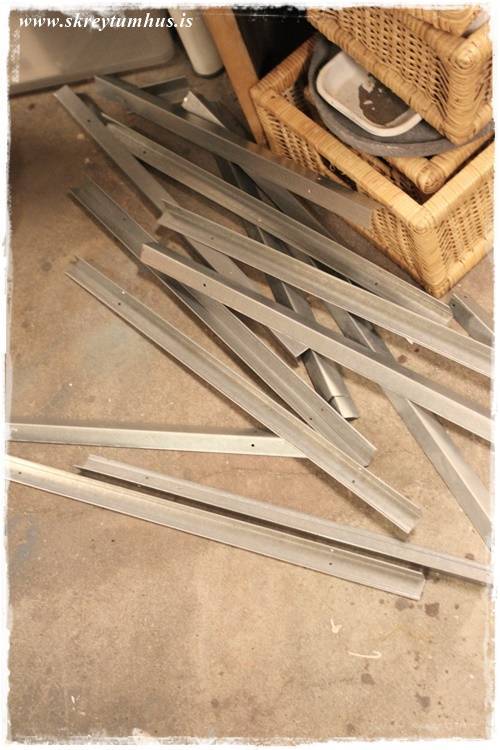
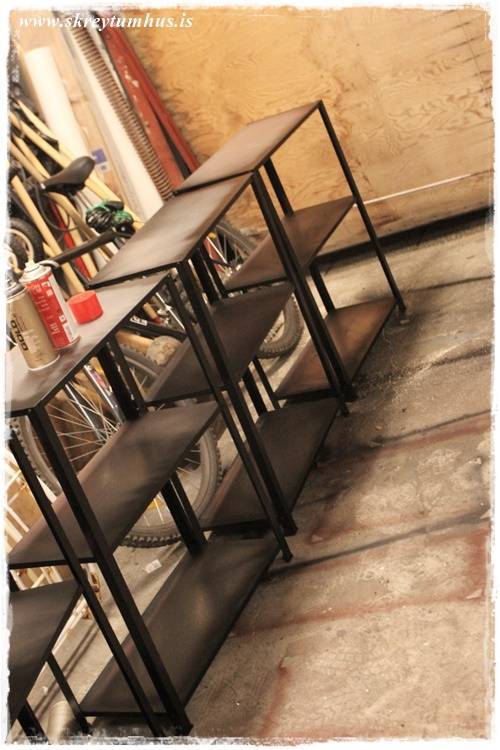
…so my solution was to buy the Hyllis units from Ikea. Super cheap, industrial looking for sure, but not very sturdy…
…for this purpose we used four units. In order to get the shelves just as we wanted, we deceided to turn each shelf upside down and flip the actual shelves. That we had them just as we had invisioned them…
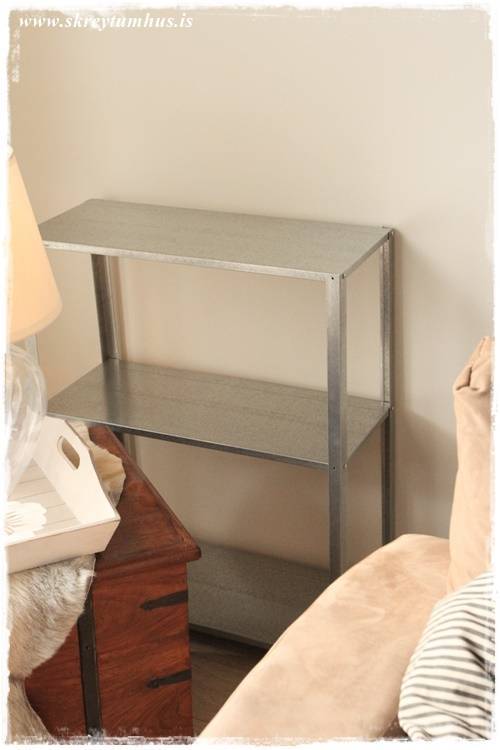
…turning them upside might seem strange, but that was the best way to get them to fit…

…my husband then took each and every unit and cut them to the right length. We were hopeing to cut each one into two parts and use both, but since they are very inexpensive and we wanted it just right – four units was the only way to go…
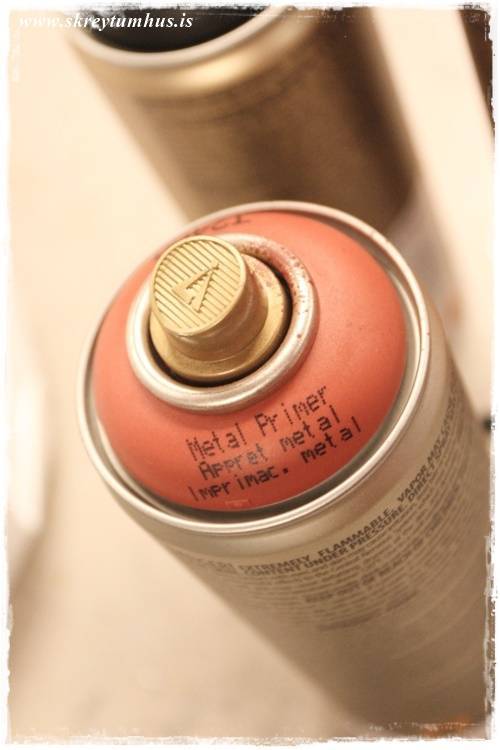
…after reassembling them the next step was to spraypaint them with a primer…
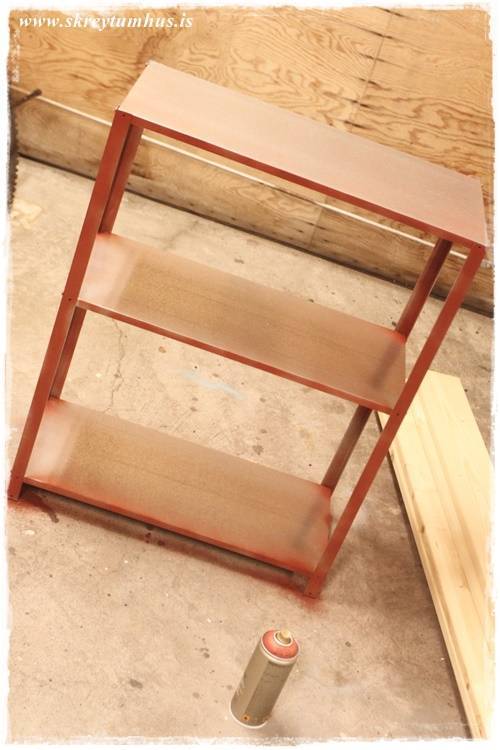
…using Metal Primer from Montana…
…then some Black matt spraypaint – also Montana…
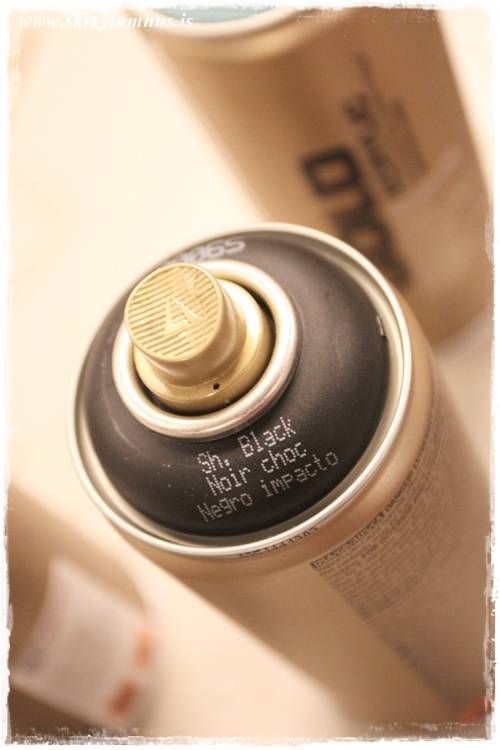
…and as you can see this took a while…
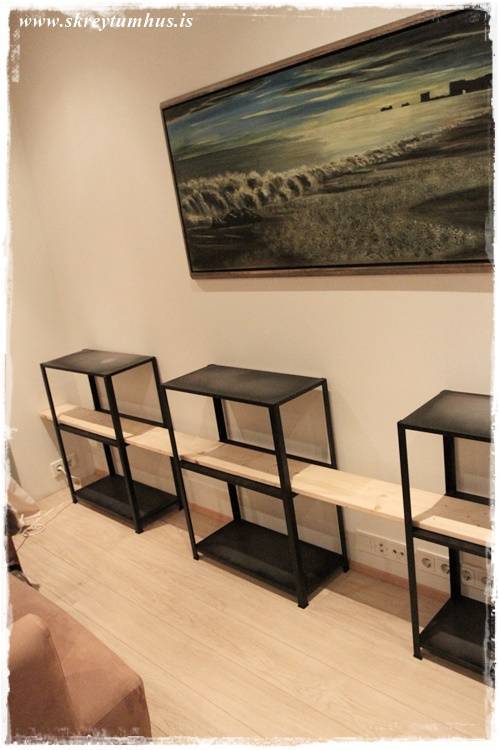
…then after a coat of clear finishing spray we hauled all shelves into the house and tried them to see how they fit the best…
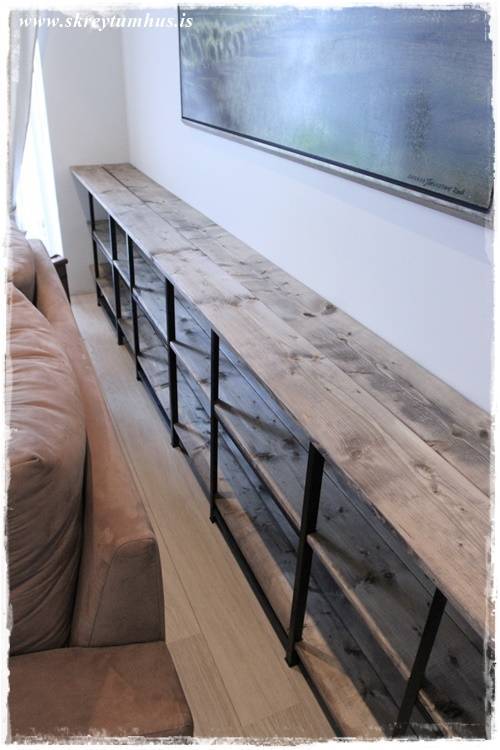
…the wall is 4m, and the space we had to fit the wooden boards was 27cm…
…we made marks in the wood boards in order to see where to cut, and then it was off to the “cutting board”…
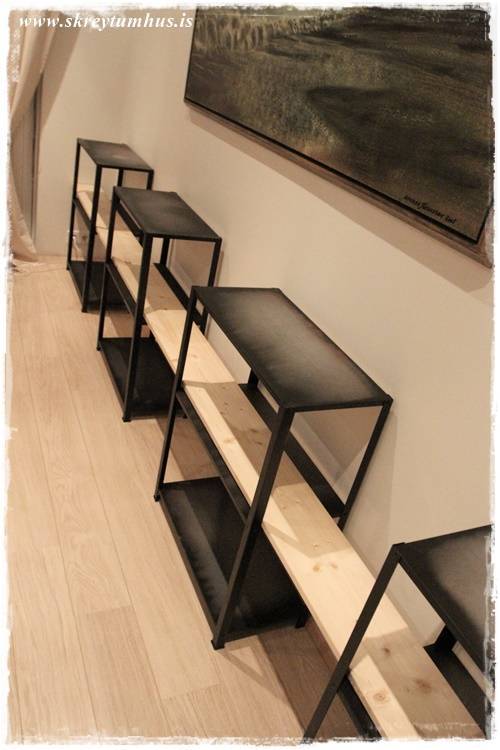
…I treated the wooden boards with wood stain, a mixed together antique oak and teak…
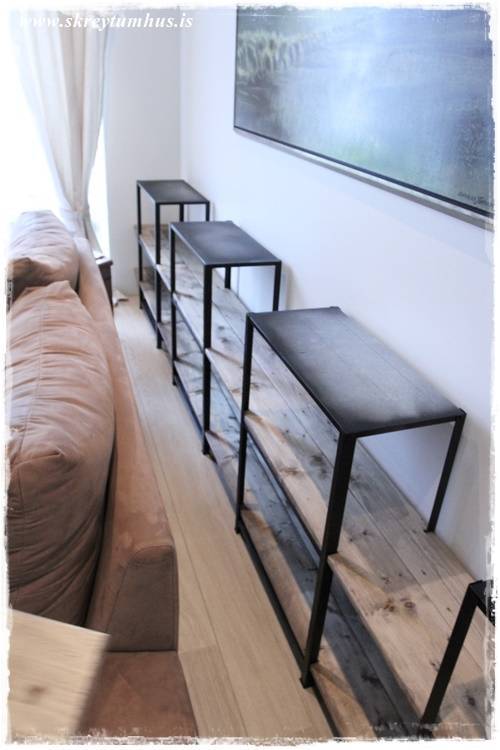
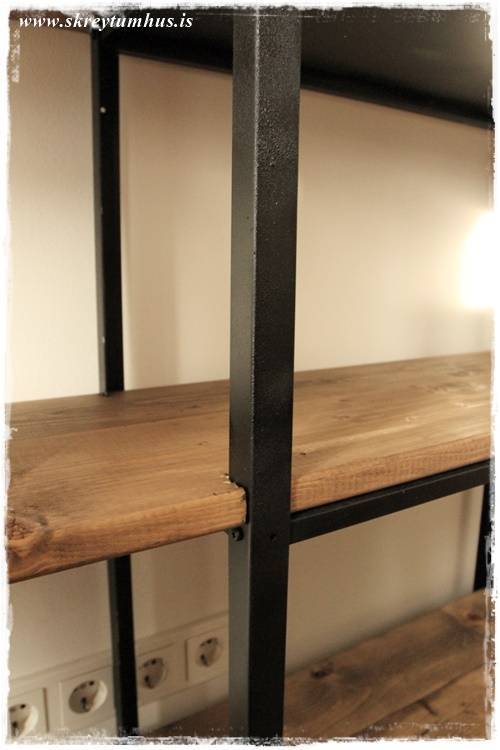
…when placing the top boards we deceided to have them a bit wider – to get a more polished look…
…and the end result came so close to what I had already “seen” in my head…

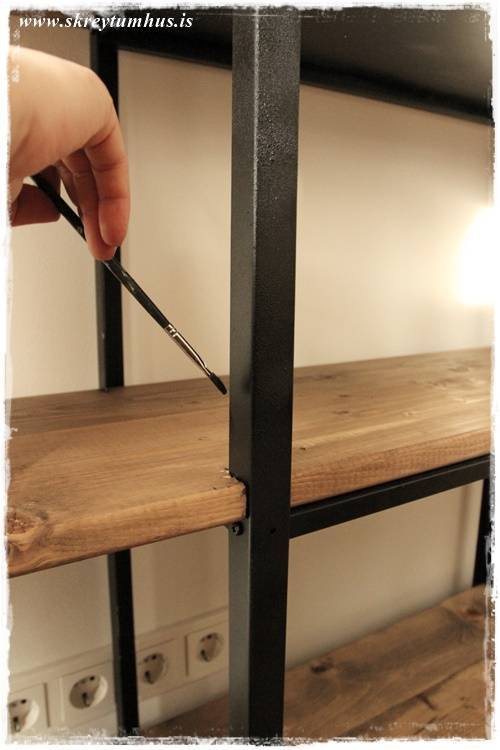
…when we were getting everthing in the right place the poor shelfs took some beating…

…so I simply sprayed some paint into the box and painted in were needed..
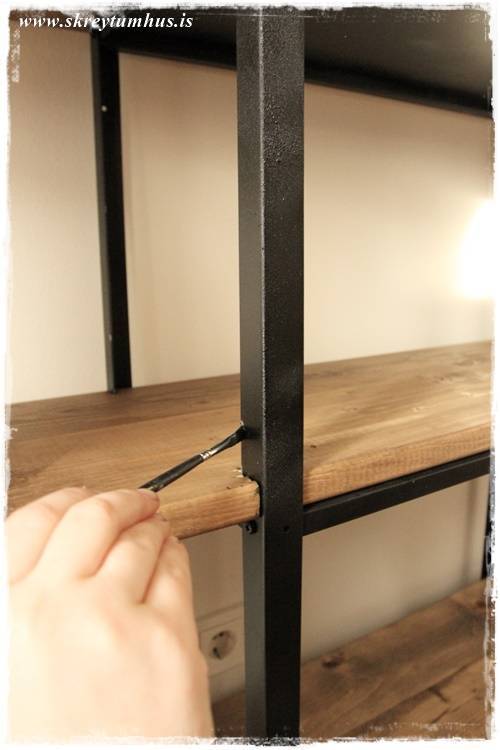
…easy solution…
…and it was a good fit, even the electricity outlets fit perfectly…
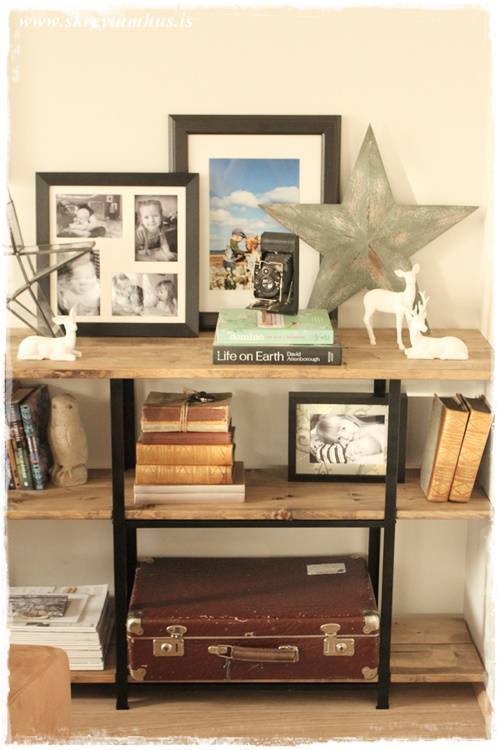
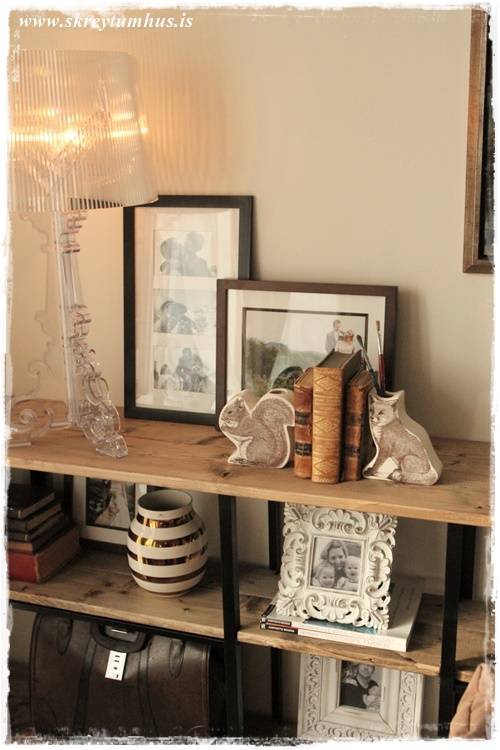
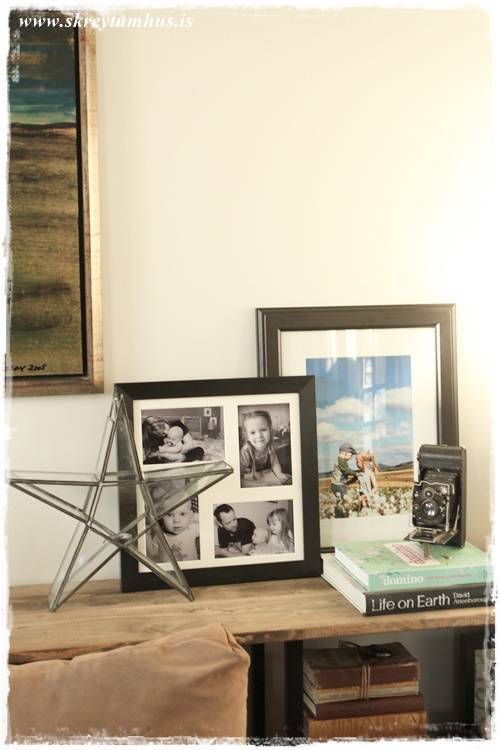
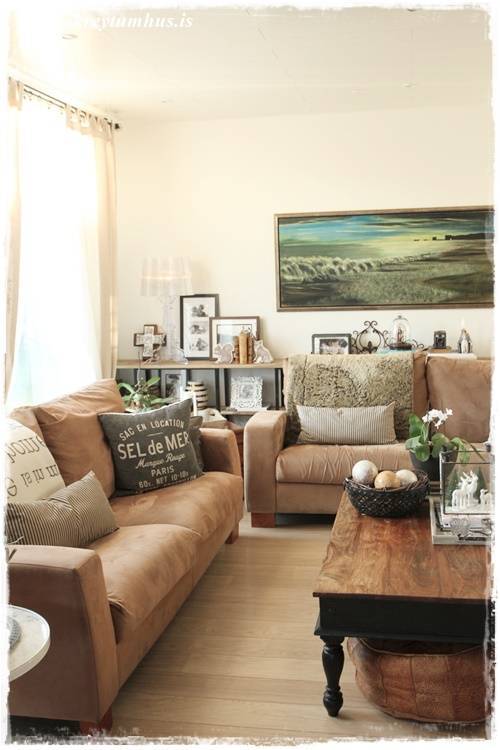
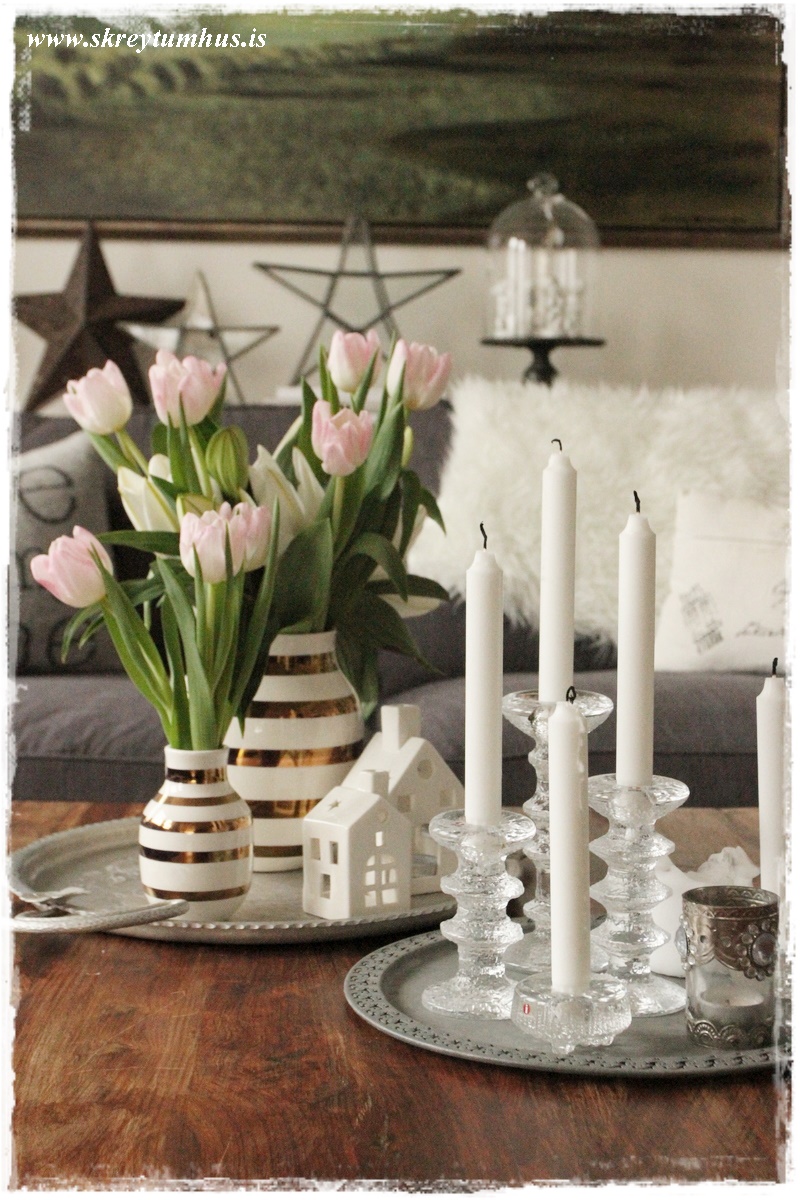
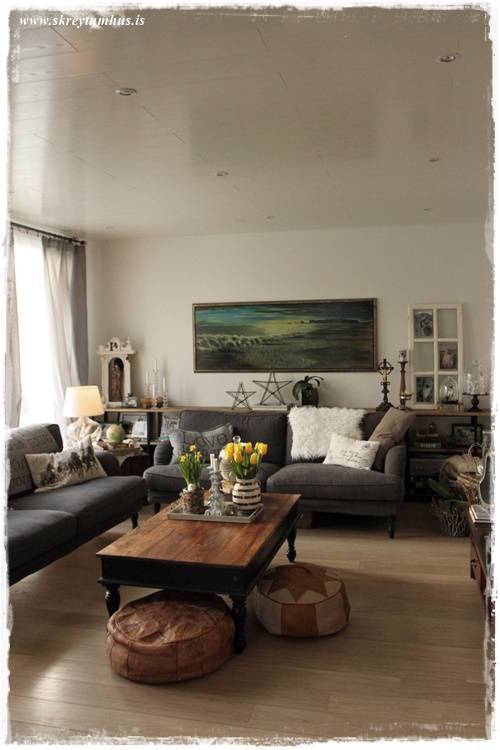
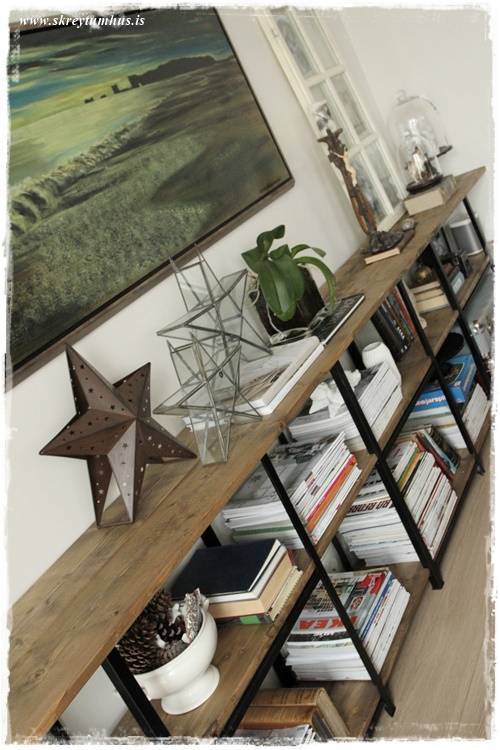
…and then for the fun part – styling…
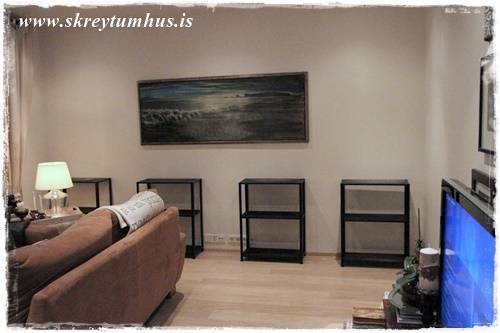
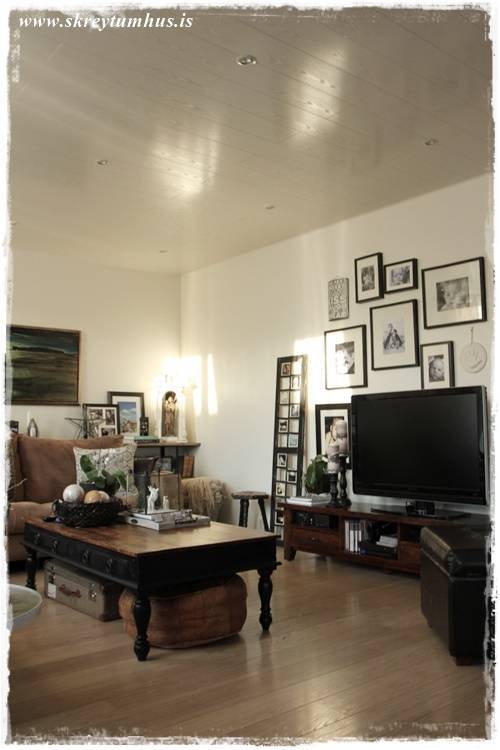
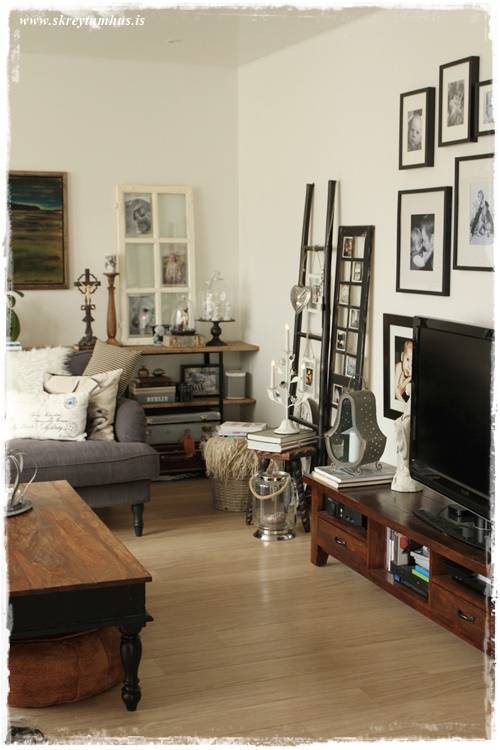
…since part of the shelves are hidden behind the couch it was perfect to store magazines and such items…
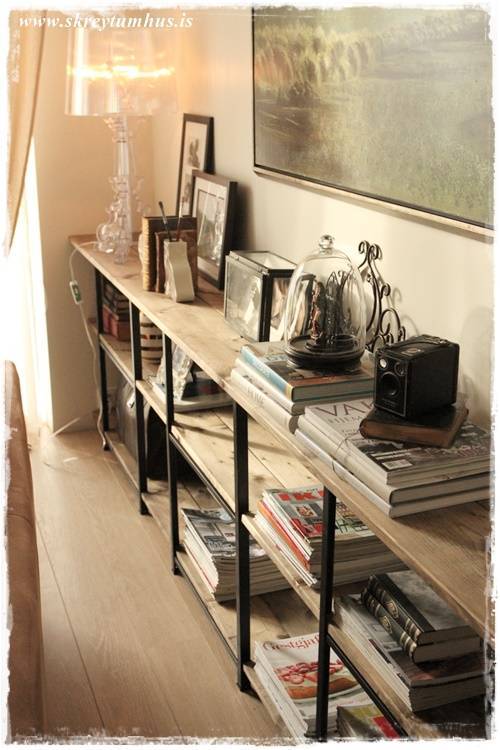
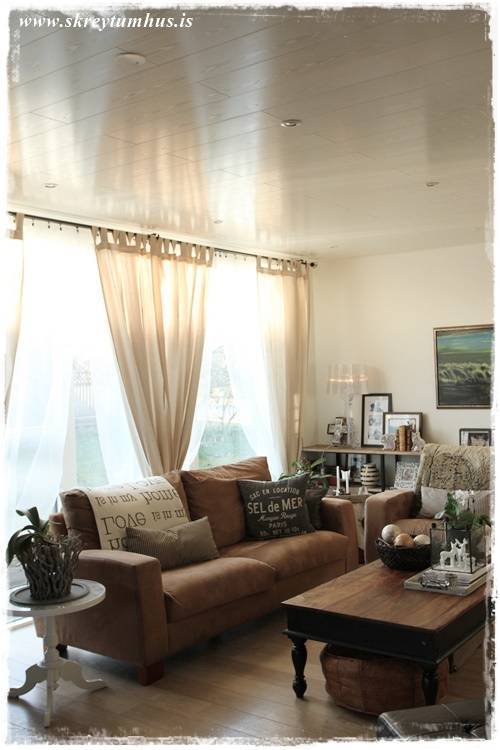
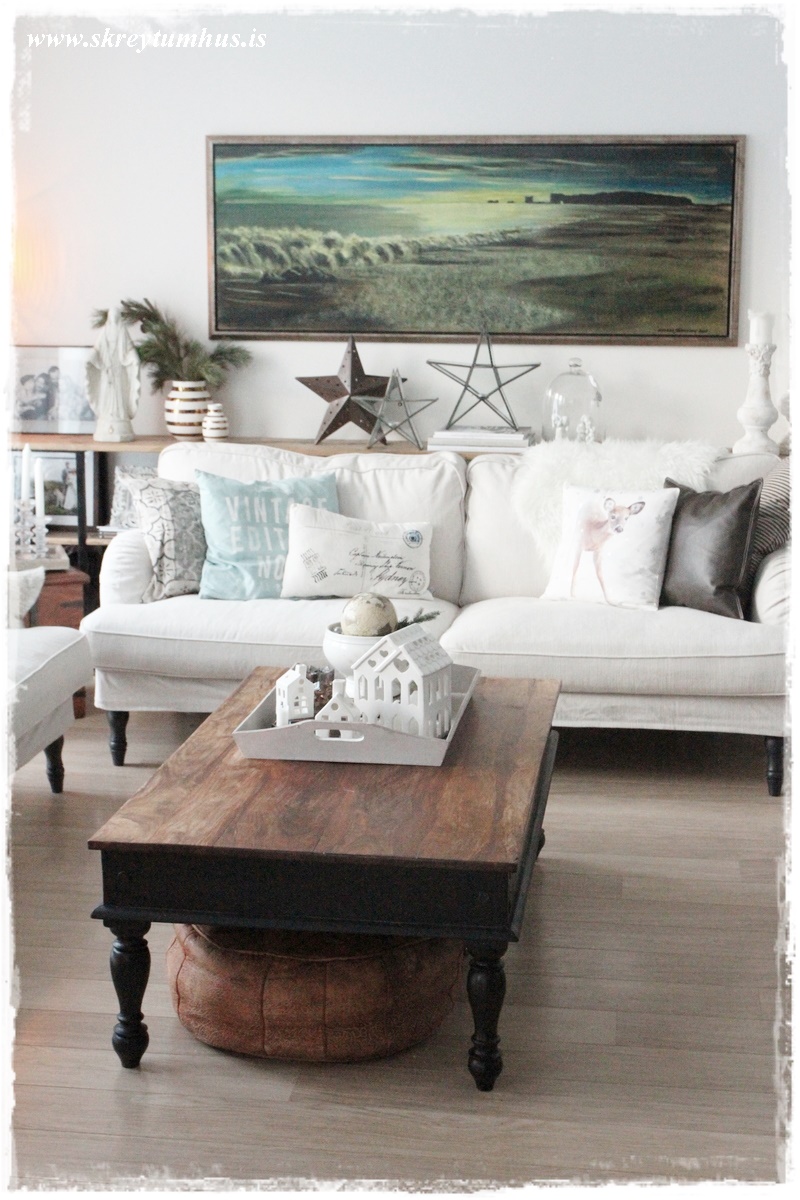
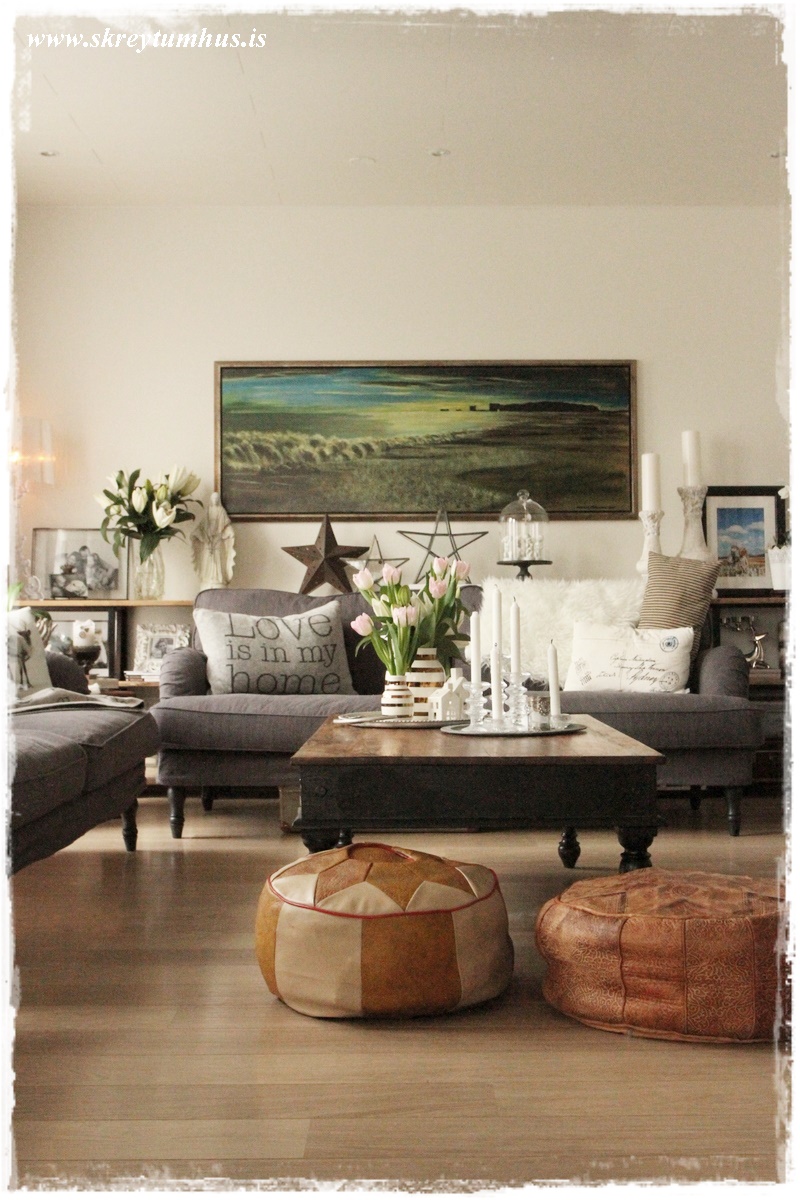
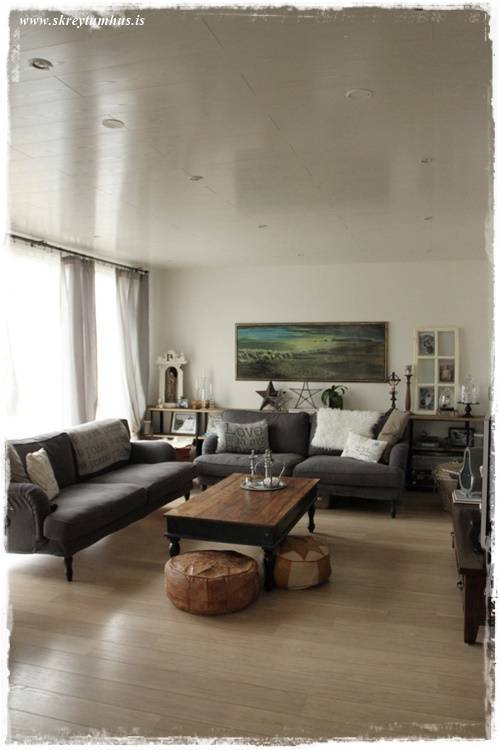
…and this is the final results:
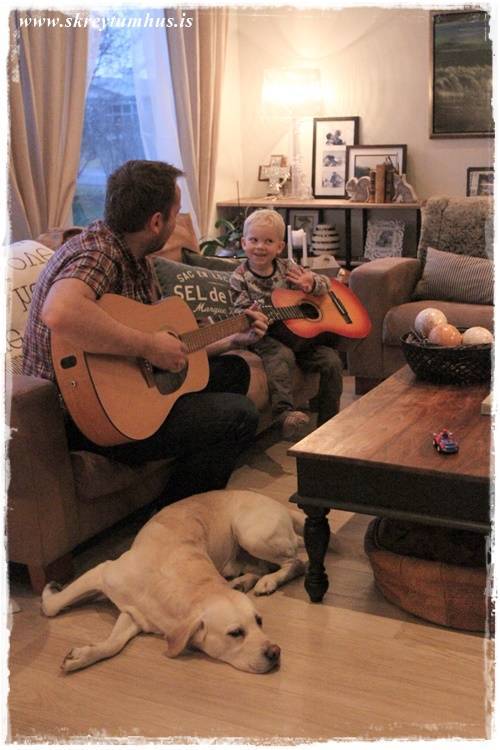
…and we could not be happier….
…and our son seems to approve 😉 …
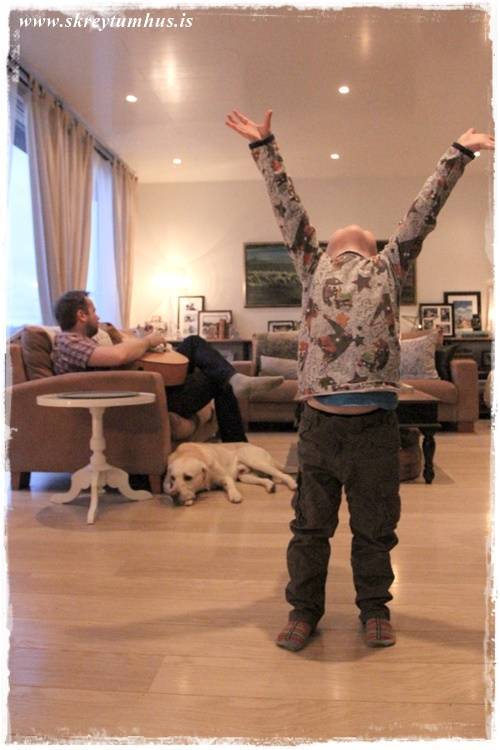
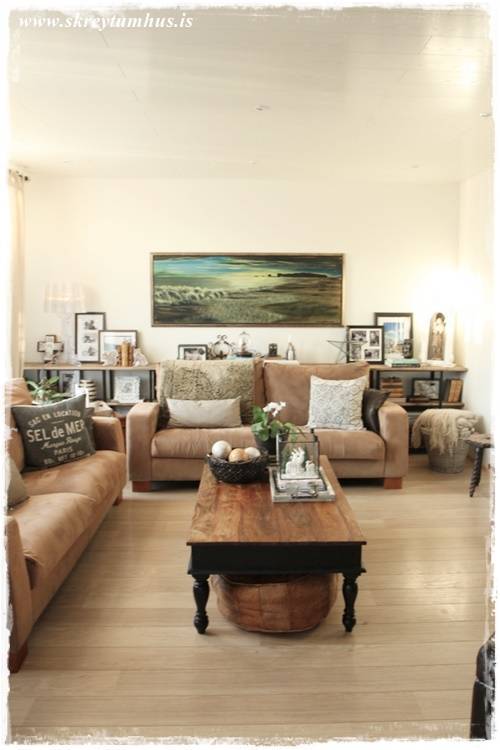
…and it sort of finshes the room of perfectly and created the right ambience…
…just the wibe I wanted…
…gives the room plenty of character and personality..
…dont you agree?
…So please feel free to leave questions and I´ll do my best to answer them.
Also english is not my first language so please excuse all grammatical errors…
Thanks so much ❤
Aha!
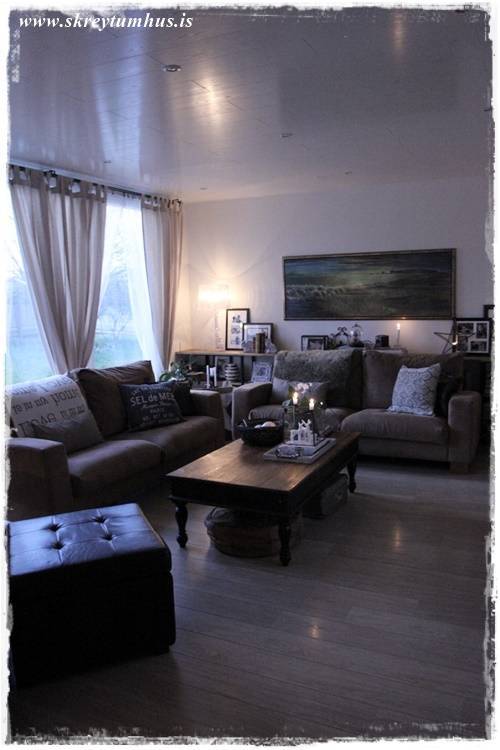
Updated with photos of the new sofa, Stocksund from Ikea as well 🙂

This is wonderful. You did a very good job, with the project and translation. Thank you!
Awesome! You gave me a lot of inspriration…
I will not copy your idea, but you helped me getting back on track & reset my thoughts after a period of refurbishment that never seemed to end.
Thank you for sharing!
I’m currently in a “period of refurbishment that never seems to end.” This shelving is, I think, the last thing I need…
I hope…
Thank you for the tutorial.
This is gorgeous! One of my favorite hacks of all time. Your tutorial is really good too – good photos and descriptions. Enough information to be able to make this myself, without it being too detailed and overwhelmingly long. Thanks for sharing – it is an inspiration.
Hi! Could you explain more about the shelves upside down? I don’t see it in the picture.
Beautifull by the way!!
Thanks Marianne, I´ll do my best 🙂
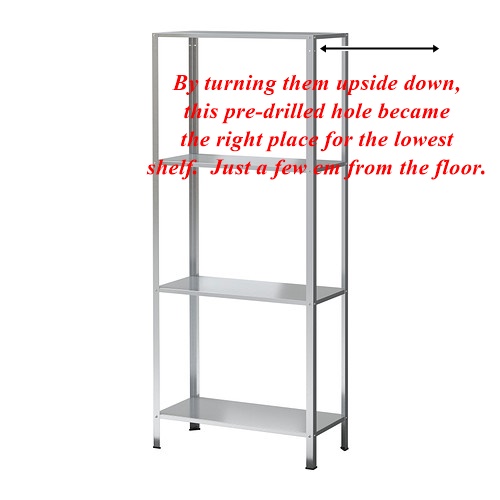
You see there are holes for the screws at the bottom and at the top. It we had used them the normal way, the bottom shelf would have been at least 10cm from the floor. But by flipping them over, up side down, we used the predrilled holes and could place the bottom shelf just 3-4 cm from the floor.
That suited us much better! Hope this makes sense.
I still don’t get it. But will have a good look. Thanks anyway 😉
It is the uprights that are used upside down, not the shelves
Thank you so much for your tutorial and this magnifique idea !!! I have do my best to do the same in my place … it’s no as good but I love it anyway !!! One more time thank you, your idea have cross until France … ( sorry for my english !)
This looks great!! Love it!
Is the top board fixed to the shelf?
That was the plan, but in the end there was no need to. The planks sit perfectly still and dont pudge at all. But the two top boards have been fastened together 🙂
Hi there!
How have the two top boards been fastened together? I like that you can’t see it (sleek!) but not sure how to make it happen.
Thanks!
Hi Nicole,
Yes the are fastened together from underneath. It was safer that way. We just used a small metal bracket with two predrilled holes 🙂
Wonderful! I think you did a great job with your translation too. It was very easy to understand. I have been looking for something like this that was affordable. I may just try it. I like the taller shelves and I have high ceilings, so I could use the shelves without cutting them down. Do you know what type of wood you used?
Thanks so much Shay 🙂 The wood is just basic pine planks, very affordable! I think the taller version could look wonderful as well – please share a picture if you go through with them 🙂
Thank you so much for sharing this! I love the Pottery Barn Griffin media console but could never justify that $1100 price tag. This hack will get the same look for a fraction of the price. I really love it. I think your idea will soon be showing up in homes across the world.
Thanks Marcia! 🙂
Such a great unit! Wondering what width was the wood planks you used? Was it pre cut or did you had them cut to certain width?
We found planks at two different widths that together fit perfectly in between. However when we came home we discovered that we had gotten the wrong width. So we had to cut one of the planks down the entire length.
But finding the right width is preferable 🙂
It looks wonderful! It was a cost effective solution, and it looks great in your space 🙂
can you please tell us how you cut the shelves and what the dimensions ended up being for each shelving unit?
Please can you tell how you cut the vertical bars?
Not quite sure what you mean, we just used a handheld metal saw for what needed to be cut!
First off all Soffia, CONGRATS!! it’s really nice, and super effective!! I’m so excited to start doing mine, and the week simply seems endless : i can’t wait for the week end to start….
I’ll do mine in white, but i love the color of the wood, is exactly the result i a searching for. A bit grey, like real aged outside wood.
Could you please be more specific about the mix you did? You mixed two products, 50% Antique oak, and 50% Teak?
Thank you so much for your advises Soffia!
This is so creative and beautiful. Great job!
Great idea, soon one in the netherlands! 😉
Thanks for the inspiration.
The finished product is outstanding. Absolutely beautiful. I would love to try it myself however I feel it mane out of my rage of expertise. Thank you so much for sharing.😐
Thank you so much for the great idea! We just made a slightly shorter version for our new house in Germany. It looks amazing!!!
Beautiful! I wish I had room in our small-ish Washington, DC condo to build this…
A fantastic piece of work for such a beautiful room!
Great work! Where did you get that fantastic coffee table from?
Gosh – the coffee table is at least 15 years old and was bought at a local store here in Iceland. It got a mini-makeover last year when I painted the bottom half 🙂
http://www.skreytumhus.is/?p=15815
great work. I love it 😀
Thank you so much for making this tutorial in English! This is the best IKEA hack and I am going to try it soon. I love the styling of your room! Great job all around!
This is a brilliant idea and the results are beautiful. If I had somewhere to put this I would make one myself. I love it. Great work.
Thanks for the English translation! Two quick questions. How did you cut the metal legs down and what was the final height of the metal shelves after they were cut?
Hi Leslie,
The legs were simply cut using a metal saw!
Hi!
Could you tell me how you cut the grooves in the bottom and middle shelves to get them to wrap around the legs?
Thanks! Love this and want to do it, just worried about the cutting of the wood!
Hello, since I think you’re the shelving hack expert… maybe you can help me out and give me some suggestions for my soon-to-happen hack.
I want to use for white DVD holders http://www.ikeahackers.net/2014/03/lerberg%C2%B2-industrial-sideboard.html#K5VllLq8iSTEEWzU.32 to copy your layout, all white though. Anything I need to look out for to make sure it doesn’t all collapse on me? I would love to keep the drillink to the minimum as I’m not very handy.
Any helpful advice for a newbie?
Tnx!!
I love it! your living room looks great! I miss european living. Beautiful tall walls with big windows.
Can you tell me what the finished height ended up being? Thanks! gail
Cam over from Apartment Therapy…beautiful shelves and beautiful room! And so kind of you to provide the (very good by the way!) English translation. Thank you!
Hi
The spare between the top and second shelf appear to be a bit smaller than it would be, if you used the predrilled holes – did you drill other holes, or is it just me? If so, how did you do that? 🙂
Hi Nina,
we just used the predrilled holes. However the unit is turned upside down and then we put the shelves in. It made more sense in regards to the botton shelf for us, to do it that way. Hope this helps 🙂
Soffia
Absolutely love this, fabulous job!
Question, instead of taking it all apart and turning it over, couldn’t you just cut down (height of the unit) from the bottom of each shelving unit?
Thanks for the inspiration!
Thanks so much Janie!
As it happens the pre-made holes on the barckets fit better for us after flipping it over. It all just depends on how you wanna use them 🙂
The shelves look amazing, Ive been looking for a solution to not enough shelving in my very small apartment with a long hall and I think this is a wonderful solution!! Thank you so much.
Leticia
How did you cut the notches in the plywood?
With a small tablesaw!
Hi Soffia,
This Hack is amazing – gorgeous bookshelves & great easy to follow directions. I’m planning to create in the living room of our new house! Thanks for your ingenuity 🙂
this is hardly an ikea hack — this is simply amazing! excellent work and fantastic translation!
Hi –
This is beautiful. I am considering doing something similar with the ikea fjalkinge (also metal, taller, and white).
How much space did you leave between each unit? I’m wondering if it is sturdy enough to leave enough space to make one of the in between spots a desk, if you put the wood boards at the right height.
Thanks!
Terrrrrrrrific, great idea, fabulous, magnifique … and your explanations are just perfect 🙂 !
Both your finished product and tutorial are amazing. Many thanks for sharing.
Someone mentioned Pottery Barn and yours looks far better. I like how it could fit any size room.
Oh my god I love this. I wanted one like this and it’s over $ 2000 CND. At the ikea in canada, they don’t carry this particular shelf. Do u know I’d it would work with another one similar? I hope so. I really want to make it. My husband anf I are NOT handy but it looks simple.
I’m not sure how you turned it upside down. I looked at the original picture then yours and all I could awe was that you shortened the shelf. Am I missing something? Lol
Great work!
Awesome!! I will do one for my house!
Could you explain me in detail how did you treated the wooden boards? The colour is wonderful!.
Thank you very much!
You are genius!
What did he use to get a smooth cut on the metal?
Please stop by storybook-cottage for fun nonsense and a few of my DIY ideas when you have a chance.
I simply LOVE this and this is my next project. Thank you for sherring and once Im finished your shelfs wee be C/P in Croatia, Zagreb!
Very beautiful! I am going to do it. Can you tell me why do you need to spray the shelves into rusty color before the black spray? Also, what is the product name for the last layer of spray (clear) you used?
The rusty color was a primer, to help the black spray paint to stick to the metal. The last layer was just clear varnish, a sealer 🙂 It was from Montana!
Hope this helps!
Thank you! I have already got the shelves. So exciting 🙂
May I know what type of wood you are using there? Thanks!
You ‘saw this in your head’. Wow. I wish my head was like that. Beautiful. Thanks for sharing your hack and excellent instructions when you could have kept it all to yourself!
Thanks Tracy 🙂
I was wondering what height you cut the uprights? 30″ (76CM) High?
Hi! This is so nice! I have a question, how big is the space between the shelves?
Great idea! Please can you tell me the brand name of the 50% antique oak and 50% teak stain that you used?
Hard to tell by picture, but do you feel these would be sturdy enough for a TV media stand in kid’s area?
hmmmmmm……not sure. But if its fastened to the wall then it should be ok 🙂
I’m in the middle of this and can’t seem to drill holes in the metal to put the top shelf on, any suggestions?
We did not have to fasten to top shelf because it was lodged in between the walls. But arent there any predrilled holes?
Brilliant!! I just love this post… IKEA has so many wonderful products that can be adapted to fit your own style & budget… great tutorial, explained perfectly. Well done & thank you
C
Do you think this would work as a tall shelf in a smaller space for example a closet? All I would end up doing would be adding the wood pieces.
It should work, sort of depends of what you intend to store in it 🙂
Mainly clothes. Just trying to get rid of all my dressers. So I’m going to try to get 2 shelves and add the wood to it. Hopefully it comes out great.
Hello! Can you please tell me what the color of the dark Stocksund sofa is? Is it the Nolhaga dark gray? Love love the shelves! I am bookmarking this for when we finally settle down and own our own home!
Hey Emily,
yes its the dark gray Nolhaga – we love the couch 🙂
I just bought the same one a few days ago! It looks great!
Hey, can you tell me the height of the shelves when its done? Im thinking of doing it myself, but im not sure if its to high, for what I planned to use it for 🙂
Thanks! 🙂
thank you for posting this! We made this for our living room and it looks amazing in the long space. Our favorite things are on it (books, globe, grandmother’s typewriter), baskets of kid toys and our TV. Great tutorial. The only thing we struggled with was the notches but we figured them out. Thanks again from Ohio, US!
Thank you so much – so glad to hear that my hack is making it´s way around the globe ❤
Hi, this is absolutely beautiful! How did you secure the top boards to the shelf? Did you simply drill through the wood into the shelf? Thanks!
Hi Brittany,
we meant to drill down the boards but in the end there was no need. The top boards were fastened securely simply by the walls 🙂 And the lower shelves arent going anywhere!
Hi,
I have a question on how you treated wood, if you did not varnish or dye? I’m trying to do it for my livingroom and I don’t know haw to treat the wood!
Thank you!
BERTA
Hi,
impressive Idea! 🙂 How high is these shelfs?
Thank you, Kelly
Thanks Kelly – the shelves are 80cm 🙂
Did you drill holes for the top shelf? Using the pre drilled holes our top shelf height is 93.98 cm.
We did not need to drill any holes, the shelves is complete wedged in between the walls 🙂
Oh my God I love this diy-shelf! Been looking for something similar but never found anything as simple AND good looking as this one! I needed to do this!
Oh, and could please tell me how high it is? 🙂
Hi,
You did a great job with these shelves 🙂
How much weight do you think they can take, do you think its strong enough to sit on?
Your living room is simply beautiful! Thanks for sharing your project! I’ll look at the ikea catalogue with fresh eyes 🙂
Thank you so much 🙂
What is the height between the bottom shelf and the next one up? I am wondering if it would work under our windows. Thanks!
You can basically control the height by using the premaid holes or just drill your own 😉 The height of our is aprox 50cm.
Thanks! You did a fantastic job!
Incredible…absolutely awesome job…
I do have a question (not in regards to your super talented work unfortunately) Where did you get your coffee table? or I would not be surprised if you made that also…
-thank you
Hey Brenda and thanks for the compliment 🙂 The coffee table was bought back in 99 and I then painted it a few years ago, under heavy Pottery Barn influence 😉
You can check it out here: http://www.skreytumhus.is/?p=15815
What brand stain did you use?
And what size width are the boards?
Very nice shelves!
Hi I have a nine foot wide wall would you suggest I use two or three of the shelves?
I´d say three shelves. But its also a question of taste 🙂
To clarify the ikea shelving units thanks!
Thank you! I can’t wait to do this project I’m so glad you’d share this! One more question- how wide is the top shelf? I like the more polished look you have. Thx- Michelle
I love this! I found this on Pinterest and I would love to make this. Thank you for sharing. I was also equally excited when I realized you are from Iceland. My mother was born and raised in Reykjavik and I still have family there. It’s so rare to happen to come across someone from Iceland accidentally 🙂
This is fantastic! We have been thinking and researching for weeks, what we could do with the long wall in our new home. We wanted a cabinet of some sorts there. But everything we found was just, mweh.
This is great, it’s everything we love and it fits our new home perfectly. Thank you so much for all the pictures and the great explanation! We are definitely going to make this 🙂
Are these sturdy enough to sit on?
I wouldnt recommend it !
This is amazing. But how did you cut the shelves? What tool did you use?
Hello,
I love your shelves and wishing to do the same .
I saw that article is not recent but I will wish to know the colors of the boards.
thank you for your reply
Muriel de France (Bordeaux)
A wood stain, a mixed together antique oak and teak!
I find it beautiful. Congratulations for the work.
Martine de Belgique
Thanks Martine 🙂
This is awesome!!! We are in the middle of this project. I’m wondering if you used any top coat like polyurethane? I’ve used the sheen finish before on another project and still found it too shiny, but yours doesn’t seem to look that way. If you could let me know what you used I’d appreciate it!!
Thanks Shradha, we did not use any top coating. Mostly because Im so impatient and I couldnt wait to start displaying things in it 🙂
This has not proven to be any problem yet and I wipe of the shelves without any problems!
Thanks so much for your response! One more question – did you do any sanding of the boards prior to staining them? Our wall is HUGE and I would love to avoid sanding if possible since it is already inside and the beams are extremely long (we ended up getting the exact length to fit the wall which are 18 feet long)!
Thanks 🙂
No sanding, just staining the wood and then decorating 😉
Hello! Your room looks amazing, wonderful job with the shelves!
May I ask were you got your lovely ocean painting you have hung? Or who the artist is? I have been looking for something like this for 6 years and it is BEAUTIFUL!
Cheers 🙂
Love the shelving! We decided to add it to our list of the Best IKEA Hacks http://www.listsforall.com/best-ikea-hacks/ Keep up the good work!
This simply looks amazing! what an amazing job 🙂
Could I ask you what kind of wood you used?
This is beautiful! Thank you for sharing. I will try the sequel 🙂
Thank you so much for your post, I am currently making this for my
living room I have a question what size lumber did you use for the lower shelfs and the upper shelf Thickness and width, please,
Gorgeous! I’m sooooo going to copy you!
Thanks for sharing!
Hi there, nice work. love it 🙂
What`s the height of the shelves in the end in cm?
Would be happy if you answer that question, thanks,
Andrea
…well, sorry, seen it was already answered–oops
Hey, I loved your Ikea hack and your center coffee table too…..Where did you buy it from??
Wonderful job and DYI Ikea hack! I can’t wait to make one for my new home! Thank you so much for sharing this – An admirer of your work from South Pasadena, California 🙂
I just came across this for the first time and absolutely love what you made! So easy! I am working on something like this for my living room although about 1/2 the size of yours. I was going to use crates but I think I like this better. Thank you for the inspiration!
What is the total height of the unit? And what is the height between shelves? Thanks
Hi! Beautiful just beautiful. Do you recall how many bottles of spray paint you used to spray the four units?
If some one wants expert view about running a blog then i recommend him/her
to go to see this web site, Keep up the good job.
I know this is an older post, but I’m currently making it for our home office in Columbus, MS, USA! Thank you for the amazing tutorial!
Hello, I would ask about coffee table. Where did you get it? I’m very interested. Please help me 🙂 regards.
Hi – the coffee table was bought back in 1999 – I have seen similar at Pottery Barn!
Hi! This turned out amazing and I’m glad to have stumbled across your post. Do you still have this in your house or have you changed it in any way? I was wondering about the notches you made with the table saw. Are they simply a small slice into the wood or did you cut out a rectangle shape? Thank you!
I really love this, but I am particularly interested in the cloche with base. Where did you get it? Thanks for sharing!
They are vintage, sorry!